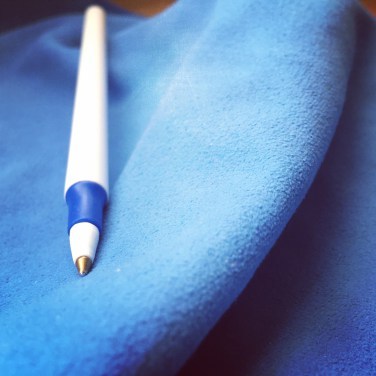
In Challenge 5 you will take photographs by capturing “blue” with your camera, selecting one image and uploading it to your blog, and most importantly, sharing a reflection on how the process of searching for blue impacted the blue in your selected photograph. We want to become metacognitively aware of the process of documentation and how it changes the way you view your surroundings: for example, causing you to look more in detail at contrasts, similarities, meanings, changes, trends, groupings, status quo, out-of-the-box thinking, and creativity.
Think of documentation as a way to become more self-aware and to fuel our motivation to learn as well as support us in making decisions about what we want or need to learn next. Documentation is part of the learning process (learn-reflect-share) where we become aware of details and nuances. This causes us to reflect deeper and more about ourselves as learners, as well as make our thinking and learning visible that otherwise would be hidden under the surface.
Here is what you need to do for this challenge:
- Choose one day (24 hours) to capture images for the challenge.
- Take time to look for and notice all of the blue in the world around you.
- Capture (shoot) as many photographs as you would like that represent different aspects of blue, remembering that you will eventually post one photograph you believe best defines blue in your world.
- Be aware of how often you think about the color blue throughout your 24 hours. Are you taking into consideration that other people will be seeing your “photo of blue?”
- By the end of your 24 hours, sort through and select one blue photograph that impacts you the most when you view it.
- Upload your selected photograph to your created blog post (if uploading an image is new for you, directions are included below). Add a reflection that explains why this representation of blue is important to you and how participating in this challenge has made you more aware of blue, and in what way.
- How did your metacognitive thinking of “documenting all things blue” as you were looking for and photographing blue deepen your understanding of blue and what it means in connection to your life?
- Create a title for your post (you can keep it simple and call it “Taking the 1-Day Blue Challenge,” or be creative), save, and publish it.
After you have completed your challenge to create an 1-Day Blue Challenge blog post, please include the URL link to your post with embedded photo in the Leave a Reply comment section below to share with us and your documenting community. Check back regularly to see what others have posted!
Added Amplification: Tweet out or share on Instagram the link to your 1-Day Blue Challenge blog post, or provide short narrative for the purpose of your capturing a blue photograph and attach your photo. Either way, include the hashtags#documenting4learning, #documenting4learningblue, and #DLBloggingChallenge5.
Directions for uploading an image (photograph) to your blog post:
Step 1:
In order to upload an image to your blog, you will need to have the image file saved or accessible n your blogging device (e.g., smartphone, tablet, laptop)
- If you are blogging from a laptop or desktop, you will need to either transfer the image file from your camera device to the laptop/desktop, or have access to it via a cloud-based service where it is stored.
- e-mail the image (from smartphone or tablet) to yourself, then open the image on your blogging device (laptop or desktop), and ave the image to your device
- if you have Apple devices (iPhone, iPad, mac), you can also use the airdrop function to transfer the image from one device to the other
Note: If you are blogging directly from your smartphone or tablet and you took the image on that phone or tablet, you can skip the Step 2.
Step 2:
1. Log into your blog’s Dashboard and add a new post.
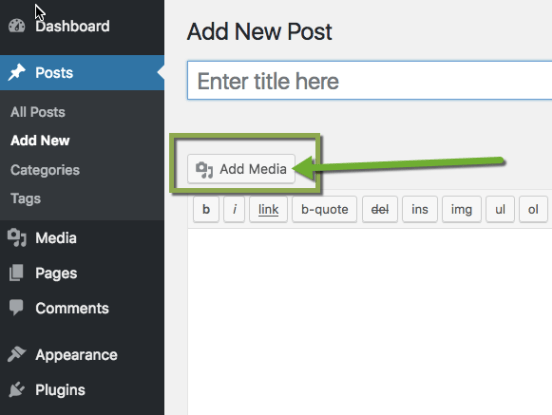
2. When you are ready to add your photograph, place the cursor near where you want to place your photo; click on the Add Media button.
3. Navigate to the saved image you want to upload from the appropriate folder.
4. Click on the Open button.
Step 3:
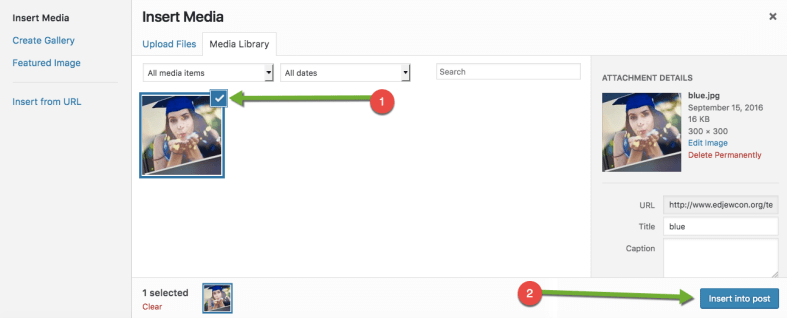
1. Once the image is uploaded, make sure it is properly selected.
2. Click the Insert into post button. This will insert the chosen image where your placed your cursor. You can resize, drag and drop (or cut and paste) your image, if desired.


